
Although a majority of our customers find the RING NOODLE easy to use, we sometimes get asked for more detailed instructions on how to correctly use the product. In this simple, 3-Step Guide, we'll show you how RING NOODLE can easily make your ring fit again.
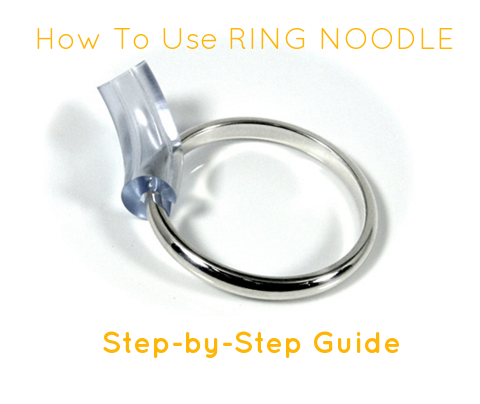
Step 1. Place Ring Against RING NOODLE Side w/ Slit

If you look closely, you'll notice that one side of the RING NOODLE has a cut slit (the "humped" side instead of the "caved in" side). We find it easier if you start with putting the ring into this side first. After you've got it started most of the way, it's time to move on to Step 2.
Step 2. Flip the RING NOODLE Around

After you have the RING NOODLE started, flip it around on the ring so that the "humped" side matches the curvature of the ring. The result is a perfectly snug fit against your ring. At this point you might be done with installing the RING NOODLE, but if you find that that it is too long you can move onto the optional Step 3.
(Optional) Step 3. Cut the RING NOODLE to Length w/ Scissors

RING NOODLEs come shipped at a slightly longer length than may be necessary for your purposes. This is to ensure that the product will fit as many rings as possible. But you may find that the length of your particular RING NOODLE is too long. Although the RING NOODLE is incredibly durable, a good pair of household scissors will be able to cut the product down to a length that is agreeable to you. Compare Step 2's image with Step 3's image and you'll see the difference between the RING NOODLE lengths before and after cutting.
That's it! You now have a customized, perfectly fitting ring guard. If you have any further questions or comments, feel free to contact us at info@ring-guard.com.